Support Document
 Support Document
How to setup Pax?
Pax device setup for taking credit card transaction in Rapid POS.
- To set up your Pax device, first, open up Rapid RMS on your iPad.
- On the main dashboard, click on the Settings icon at the bottom of the screen.
- A left-hand menu will appear. Choose Hardware Settings > Pax Configuration.
- This is where you will enter your Pax IP and Port numbers. Here is how to find your IP
- On your Pax device, select Menu
- Enter today’s date: mm/dd/yyyy
- Scroll down to Communication
- Enter your passcode
- Choose LAN Parameter > IP and write the IP down
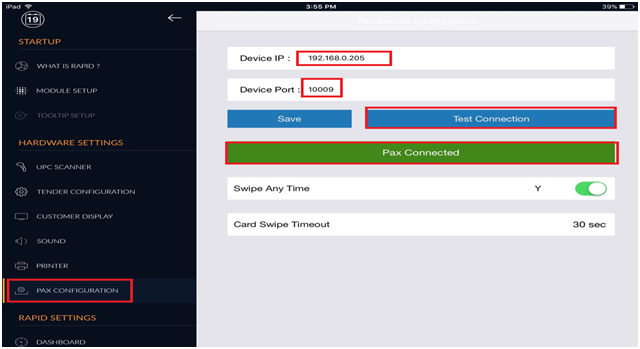
Now, on the iPad, enter the IP number in the IP field.
NOTE: If your IP number has zeros in the last two number sections, you will need to remove them.
For example:
If your IP number looks something like this: 192.168.001.004
Then, change it to this: 192.168.1.4
If your IP number looks something like this: 192.168.001.194
Then, change it to this: 192.168.1.194
In the Port field, enter this number:
10009
Once you have entered the Port and IP numbers, click Save. You may now confirm the connection with a test CC sale.
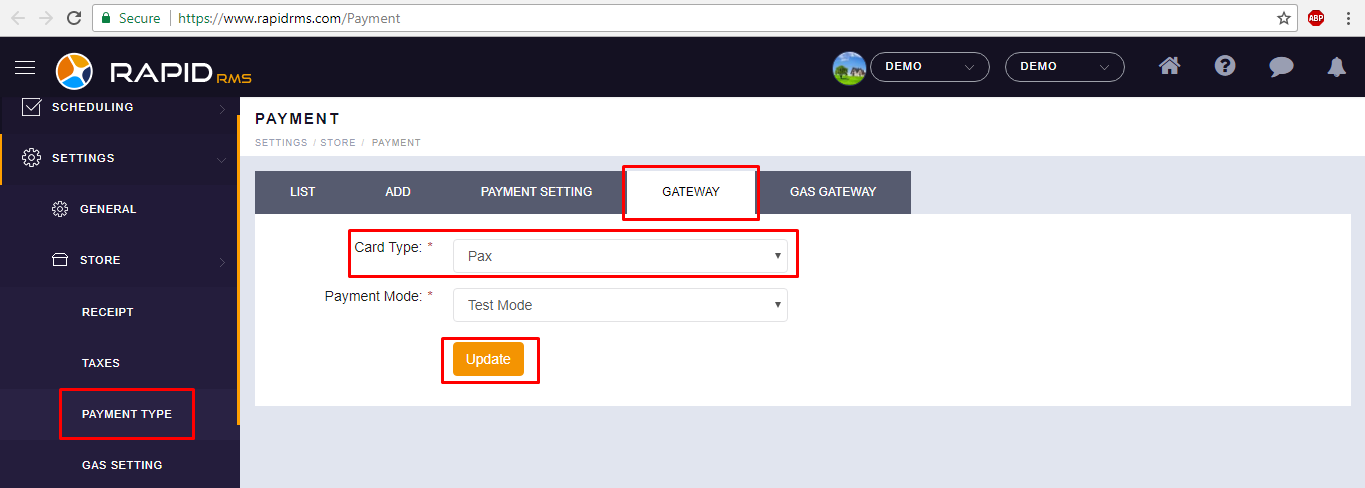
- Now, login to your Back-Office.
- Go to Settings > Store > Payment Type and click on Gateway in the top tabs.
- Select Pax in the Card Type dropdown.
- In the Payment Mode dropdown, choose Live Mode and then click Update.
- Finally, exit the application on your iPad (double-click home button and swipe up) and restart to
begin accepting Pax transactions.