Support Document
 Support Document
How to Create New Vendor and New Sales Representative?
- Open the RapidRMS application on your iPad.
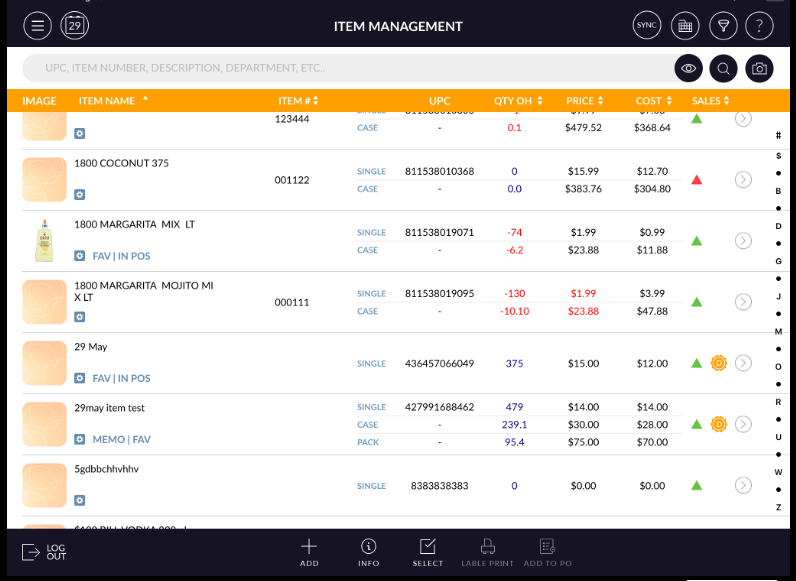
- Select Inventory Management from the dashboard.
- Enter your quick access password
- Click on add button to create a new Item from the bottom of the page or click on any item from the
list to edit an existing Item.
- Add/Edit Item screen will open.
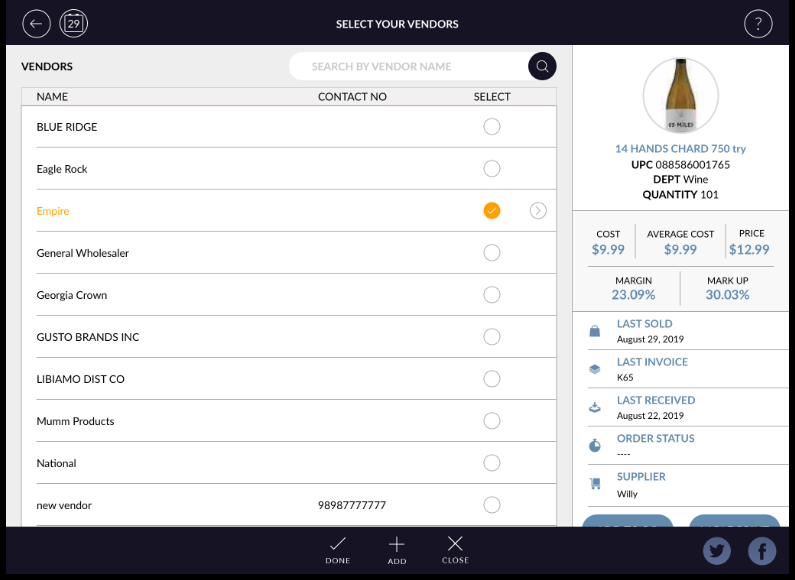
- There is a vendor option available in the below tax section. You may need to scroll down.
- The vendor section is available under the Info tab.
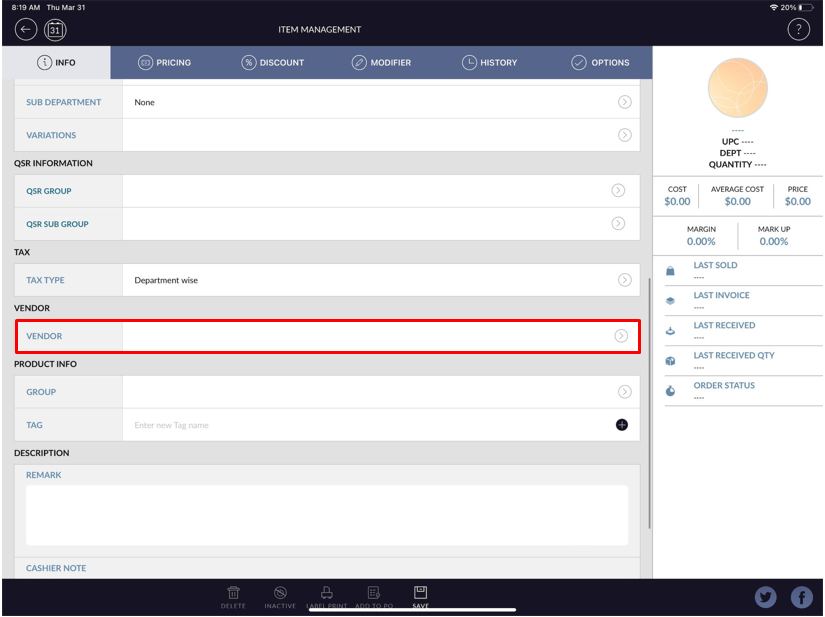
- Click on “>” option to open vendor list.
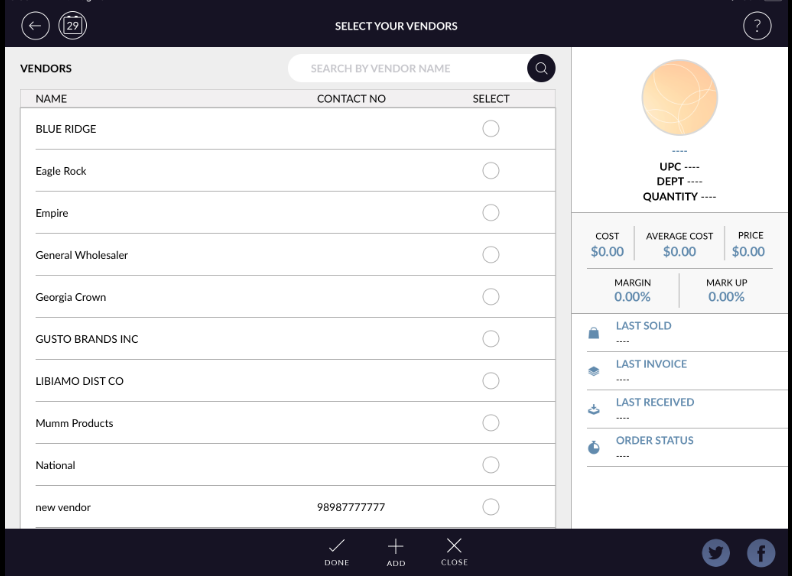
-
Click on Add New Vendor button from the bottom of the screen.
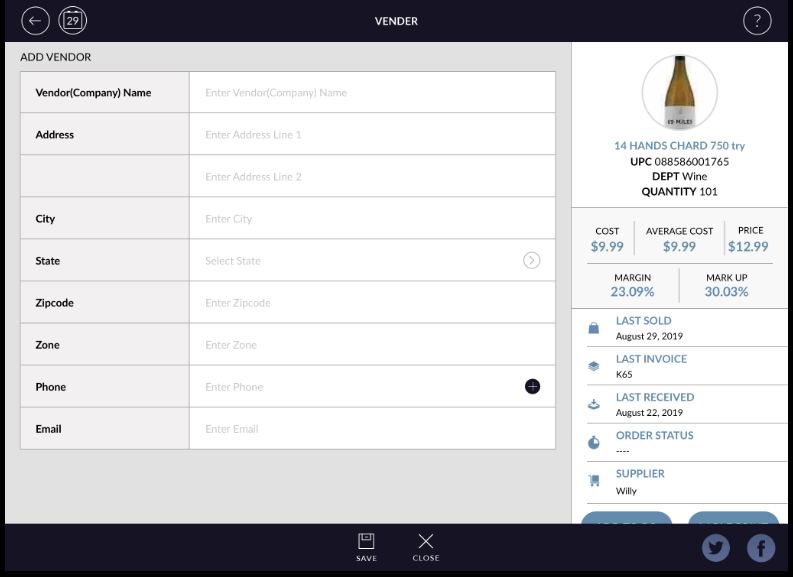
- Fill in vendor necessary details and click on the save button. The added vendor will appear in the list.
- If you want to add sales representative detail, first select a vendor from the list.
-
There will appear > sign on the right side of selected vendor from the list.
-
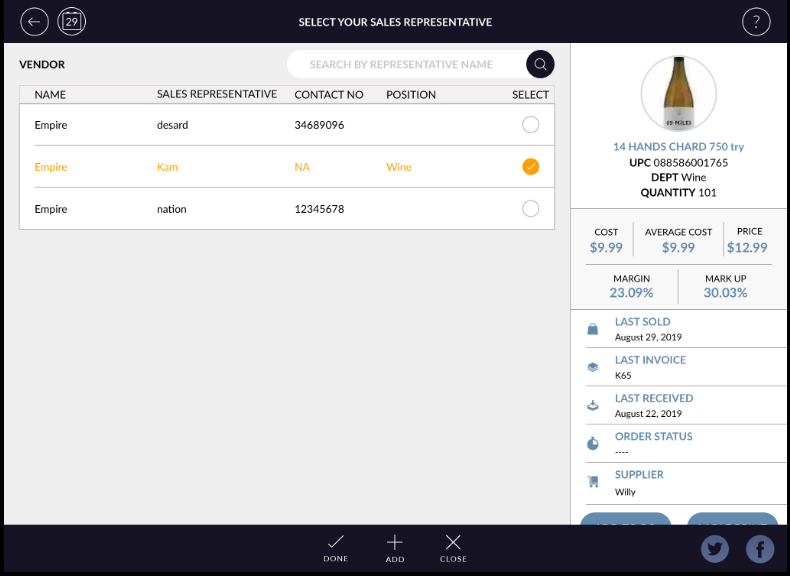
Click on the > option. The sales Representative window will open.
-
Click on Add button to create new representative from the bottom of the page.
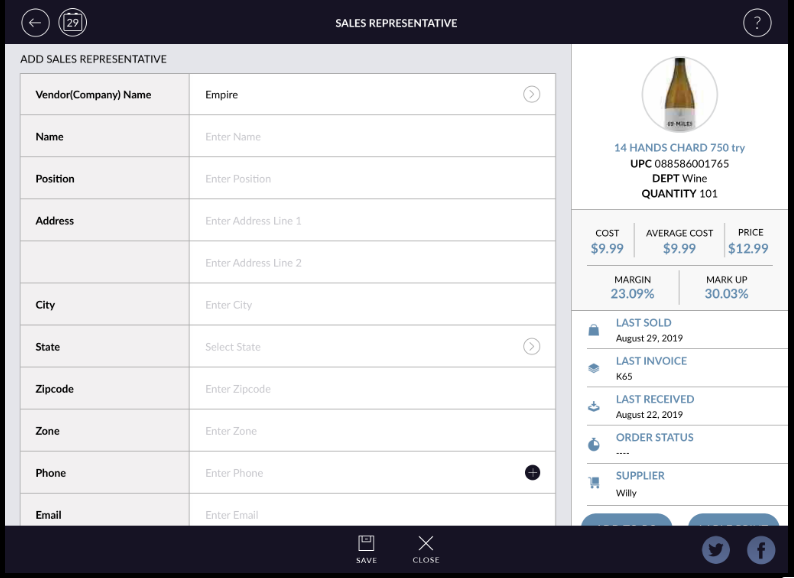
- Fill up the necessary details and click on the Save button. The added sales representative will appear on the list.
- If you want to select the sales representative for the vendor, Select the sales representative and click on done buton.
- If you do not want to select sales representative, click on close buton.
- It will appear vendor list again.
- Please unselect the vendor from the list.
- click on close button again.
- Now, click on <- Back arrow button from the top left side corner of the screen.